June 27, 2009

It's Not Delivery, It's Kraft

This is an ode to Kraft Pizza Kits.

Oh Kraft Pizza Kits, how simple you are.
The basics are covered,
every thing thought of ahead of time!
Parmesan cheese, oregano, sauce,
it is ALL there- ready for the cooking.
You have created a palate for me to work with,
a canvas to create art work on.
My art has become so delicious Kraft Pizza Kits,
and I can thank you for....


okay. okay. I just couldn't think of any other way to introduce a recipe that I didn't make from scratch at all. But I declare that Kraft Pizza Kits are undiscovered treasures, awaiting our creativity. What a fun way to create dinner with the kids; allowing them to pick their own toppings. Plus it really easy whip up if you don't have a lot of time/energy.

If you haven't given them a go before, please do. My family could make a pizza from scratch, but with this mix we always find excuses not to. For example, "it is too quick!" and "the sauce on this one tastes way better." So why mess with a good thing?

For a little inspiration, here is the pizza I made:


It plays host to:
  • chopped ham
  • green and red peppers
  • baby spinach
  • tomatoes
  • oregano
  • parm cheese
  • tex mex cheese

June 22, 2009

Pasta Rose with Zucchini, Corn, Green Peppers and Ham

Pasta is great because it creates a palate for all of those leftover veggies and meats you have lying around in your fridge. (Not to suggest that I ignore my veggies and sometimes overstock meats! No sir, not I).

I had a packaged Knorr Parma-Rosa sauce sitting around as well, and bam-shabam, lunch was served!

And what a satisfying meal it was! The combination of the sweet corn with the salty ham and savory sauce was really nice, and the green peppers were a natural fit. The zucchini gave just a subtle crunch with not an overwhelming flavor. Seriously I couln't have made a better combination if I had planned it! (It really was, 'a little of this, a little of that' in the pan).


Vegetarians
, a note to you: sub the ham for veg. ham or chicken and you have a great vegetarian lunch.

Be brave when you are making pasta! There is sooooo many things you can add to a basic tomato sauce, or a not so basic Parma-Rosa sauce (which is just a parmesean tomato sauce).


Keep in mind, any type of sauce will work. If you don't have a Knorr sauce mix or prefer a plain tomato one, that will be just as yummy. You have your own creative license over your pasta. If I was out of sauce mix, I would probably suggest an Alfredo sauce or blush sauce (tomato and Alfredo sauce combined).


Ingredients:

1 serving dry pasta ( I used vegetable fussili)
1 package Knorr Parma-Rosa sauce mix (+ 1/2 Tbsp. butter and 1 1/2 c. milk)
1/3 c. green zucchini, chopped into bite size pieces
1/4 c. frozen corn
1/4 c. green peppers, chopped
2 slices deli ham, sliced
parmesean cheese

Directions:

1. Put water on to boil for the pasta. Meanwhile begin pasta sauce and cook as directed on the package. Boil pasta according to package directions.

2. In a sautee pan, simmer one serving of sauce, zucchini, frozen corn, green peppers, and ham for about five minutes. Put cooked pasta and some parmesean cheese into the pan, combine, and serve. Top with additional parmesean cheese.

Fruity Sangria


Well! Is it not finally the season for fruity, and fun cocktails? I think so!

Growing up I looooved having drinks that looked grown up and fancy, but (not to worry) I enjoyed the moctail version. There is just something really special about enjoying colourful, decorated beverages, drinking out of a glass which is only used for fancy occasions, and using a pink straw, and/or umbrella. (You know the kind I'm talking about!)

Now that I'm (relatively) older, my tastes have matured along with me but I still love the feeling a fancy drink brings. If you're the same way, you will love this recipe for Fruity Sangria.
Not familiar with Sangria? Here is a quick run-through:

Sangria is a wine punch typical of Spain and Portugal. It normally consists of:
  • red wine
  • chopped or sliced fruit (often orange, lemon, apple, peach, berries, pinapple; ocasionally melon, grape, or mango)
  • a sweetner such as honey, sugar, or orange juice
  • a small amount of added brandy, triple sec, or other spirits
  • carbonated soda, in some recipies
  • and ice
This Fruity Sangria is combined with tropical and local fruit which, if given time to sit, incorporate exciting flavors into your drink.


Not into the alcoholic version? No problem! Skip the wine and replace it with white or regular grape juice, apple juice or grapefruit juice.

Ingredients:

For one glass.

In terms of amounts, you can use as much of as little of any ingredient as you would like, these are just rough guidelines.
1/2 can sparkling soda (I used Spritz UP)
2 slices lime
1/4 banana, sliced
1 slice orange
3-4 ice cubes
White wine, to fill the rest of the glass

Directions:

1. Assemble fruit in the glasses (or a large pitcher if you want to make more) and pour in your sparkling soda, ice, and finally, the wine.

2. Allow the drink to sit for a little while (I waited 30 minutes) so that the fruit can flavor your sangria. If you aren't patient like that, and I don't blame you, you can enjoy it immediately.


June 21, 2009

Would You Walk 100 Miles?


In honor of the first 100 hits on my blog, I decided to commemorate the event with a post about the 100-Mile Diet. This diet has proved cost effective, environmentally friendly, and delicious for centuries but only recently, has become somewhat of a fad. Something actually cool and in style. In an attempt to understand more about its benefits and the diet itself, let's explore a bit, shall we?

History:

In 2005, Alisa Smith and J.B. MacKinnon:
began a one-year experiment in local eating. Their 100-Mile Diet struck a deeper chord than anyone could have predicted, inspiring thousands of individuals, and even whole communities, to change the way they eat. Locally raised and produced food has been called “the new organic" — better tasting, better for the environment, better for local economies, and better for your health. From reviving the family farm to reconnecting with the seasons, the local foods movement is turning good eating into a revolution.

My Take:

I was introduced to the whole "100 mile-diet/challenge" a while back, and recently watched the first episode of the TV series on Food TV. (The series follows 6 families for 100 days while they try their very best to eat completely locally). I think that the idea is brilliant, but I can't help but wonder, what are these guys going to eat during the winter? There is so much more that we could be doing to help the planet and our bodies, and if it takes a challenge like this one to get people motivated, then great!

I think that sometimes we think, I don't eat locally often, so why bother making an attempt at doing it a lot? That would be too hard. It would be hard! But can you imagine how creative and resourceful you would become if you knew the ins and outs of your local markets? You would know, say, that on Monday nights flour at the mill is half price. Or that the local butcher's beef is certified organic, and only travels a few miles from pasture to plate. What interesting information you could acquire!

I was personally inspired by the challenge because it forces a family to work together, think creatively, and work towards a similar goal. If children are raised to understand that things like the 100-mile diet are important, and that it is possible to live by it, who knows the impact it would have!

I feel as though I am getting excited over this diet just by writing about it. You should try it too! Talk about it, share the idea, see what others think. Maybe there are a few people who live near you who would be willing to pitch in for a local milk delivery.

Read the 100-Mile's local eating tips here.

Images courtesy of http://image.radio-france.fr/franceinter/_media/diff/395033857.jpg and http://images.theage.com.au/ftage/ffximage/2008/06/27/diet_narrowweb__300x481,0.jpg

Pasta Ponza

This dish has quickly become one of my favourites!

It was inspired by Giada de Laurentis, the chef on Food Network's, "Everyday Italian." First, don't you think she is one of the friendliest chefs, ever?! I often feel more cheery after watching her show because she is always smiling, and finds so much joy in cooking for others. (Her and I have that in common!) Check out her website with Food Network here.

As for today's recipe, it came as a complete shock to me, how simple yet satisfying it was. The sweetness of the heirloom tomatoes, in combination with salty Parmesan and savory breadcrumbs, create a healthy, vegetarian option for your next dinner party. And seriously, you couldn't make this dish any easier if you tried.

Indeed, Italians are masters at transforming simple, everyday ingredients into dishes that are quick, healthy and satisfying.


When you are searching for tomatoes, the shot above shows the ones that I always go for; they are sweet heirloom tomatoes. An heirloom vegetable is a cultivar that was commonly grown during earlier periods in human history, but which is not used in modern large-scale agriculture. A true heirloom is a cultivar that has been nurtured, selected, and handed down from one family member to another for many generations. One box (which can be found at any grocery store that carries the President's Choice brand), is enough to feed about 3 people.


When I go back to school in the fall I know that this recipe will be a weekly go-to. The ingredients are on hand most of the time, and it only costs about $2.50 per portion. How awesome is that!?

I hope you enjoy it as much as I do! And as the Italians would say, Buon appetito!

Ingredients:

1 box sweet heirloom tomatoes
salt and pepper*
basil leaves*
olive oil*
onion flakes*
seasoned bread crumbs*
parmesan cheese*
seasoned breadcrumbs*
3 servings of dry spagetti
a handful of chopped parsley (optional)

*Amounts will be very rough, as it seems to always be with Italian cooking! A simple shake/drizzle over the tomatoes of each will be adequate.

Directions:

1. Preheat oven to 375 degrees (or 350 for a convection oven). In a medium size, baking dish (pictured right), rub the sides with butter to prevent sticking.

2. Chop tomatoes into halves and quarters and place into the baking dish. Cover (as shown right), with a few pinches of salt and pepper, a good drizzle of olive oil, a light shake of onion and basil flakes, a thicker layer of breadcrumbs, and finally, another drizzle of olive oil. Bake for 30 minutes.

3. Meanwhile, cook pasta according to package directions. When the tomatoes have cooked, pour over pasta and sprinkle with Parmesan cheese.

June 20, 2009

Blueberry Pancakes with Orange and Butter Infused Maple Syrup

I have no problem topping my cereal with blueberries and calling that a successful breakfast. But that's what I did yesterday...

So today, blueberry pancakes were in order!

Pancakes are one of my favourite breakfast comfort foods (along with eggs Benedict), and I like to do em' up right! These Fluffy and slightly sweet cakes are filled with juicy and tart berries, and then topped with maple syrup that has been simmered with orange and butter...does it get any better than that?!


Ingredients:

Pancakes:
1 egg
3/4 c milk
1 c flour (Note: Try using half whole wheat flour for a little extra fiber)
2 Tbsp. oil
1 Tbsp. sugar
1 Tbsp. baking powder
1/2 tsp. salt
3/4 cup blueberries (preferably fresh)

Orange and Butter Maple Syrup:
1 Tbsp butter
1/2 cup maple syrup
the juice from one orange
1/2 tsp. orange zest

Directions:

Pancakes:
1. Beat egg slightly and mix in milk, oil, sugar, salt.

2. Separately, combine sifted flour and baking soda. Gently fold liquid into the dry ingredients and then add the blueberries.

3. Heat pan to medium, and add some canola oil (just enough to coat pan). When the pan is hot, you can begin scooping the batter into round dollops. You can make them as big or small as you would like. When the edges begin to appear cooked or there are bubbles forming, flip the pancake and cook until done.

4. Top with extra fresh blueberries and syrup (directions below), and serve with an orange wedge.

Orange and Butter Maple Syrup:
1. Melt butter over medium heat in a small sauce pan. Add maple syrup, orange juice and zest. Stir, and serve.

June 17, 2009

Going back in Time--St. Jacobs Style!


Leah and I went on a full-out day trip today! Destination: St. Jacobs, Ontario.

I know, it's not very glamorous, but what can I say? Not everyone needs a trip to a big city to have some big fun! We certainly have found this to be true, and headed out this morning for our very exciting, freedom filled, youth capturing, day trip.

But I must say, St. Jacob's has a bit of a reputation.

Here's a hint:Can you see that sign there? It says 'CAUTION: Horse and Buggy crossing'. Yes indeed, we stepped back in time on this rainy summer day.

St. Jacobs is known for being an area with a high Mennonite/Amish community, and I find it all very fascinating! I promise you that we did not go to poke fun at the people, but rather share in their culture, eat some amazing home-cooked food, and maaaaybe take a few pictures.

Because how often do you get to see this??

If you live near me, then the answer is: never.

Despite the misty rain we (eventually) found our way to the 'downtown' of St. Jacobs which is home to cute antique and quilt shops, bakeries, upper range clothing boutiques, and the like. Leah and I wandered around, up and down the main strip browsing clothing we couldn't afford, and eventually ended up at a huge bakery, which I am sorry to say I don't remember the name of.

The front area of the bakery were you could browse their various pasteries was fairly small, but behind that was a ginormous kitchen. It was something out of a story book, (My kind of fairy tale anyway), complete with large convection ovens and lots of mothers and daughters working away, filling the bakery with goodies that smelled like cinnamon and apples.

It was this very smell that drew Leah and I to the oh-so gooey pie like treats they had to offer. There were large cookie trays filled with beautiful Dutch apple pie that Leah went for...


...and my personal choice, strawberry rhubarb and custard pie tarts...

...pretty much the yummiest thing I have ever tasted in St. Jacobs.

If you will allow me to indulge your for a moment with a description of this treat, I will surely convince you to check this place out. (Even if I can't remember the name of the store and you don't live anywhere near Ontario)! The rhubarb was slightly sour but it worked so well with the fresh strawberries and custard fillings. I could tell that the flavors had been marrying for the whole day atleast, because they went so well together! The crumble was light but very satisfying. It didn't fall apart completely and tasted like...yummy.

I'm running out of creative words to use to describe it, so you best go and check it out for yourself!

Day trips are fun, period. But when you get to enjoy time with close friends and share in life's simple pleasures, like our yummy deserts, it makes it that much more special. I encourage you to find a local market or sister community near by that has a new culture, food specialization, or what have you. Go and experience something new, and bring a friend along for the trip!

June 15, 2009

Getting Acquainted with Asparagus

To continue with my local, fresh, and (hopefully) organic pattern...I am pleased to introduce, a perfect side veg for summer dining: The Asparagus!


Asparagus is low in calories, contains no fat or cholesterol, and is very low in sodium. It is a good source of folic acid, potassium, dietary fiber, and rutin. PLUS, (as if there could be more), it tastes yummy.

Now I know that many people might be looking at they computer with grossed out expressions. For how does one learn to love a vegetable that, ahem, makes their pee smell funny?

Well learn to love it my friends, because it so darn good for you and can be used in many ways. Today I will walk you through the basic how-to's, complete with a classic recipe: Barbecued Asparagus.

Preparation:

1. Begin by washing your asparagus like you would most vegetables (a thorough rinse in cold water) to remove any potential pesticides and/or dirt. Then, pat dry with a paper towel.

2. You probably purchased your asparagus from the grocery store where it had been sitting inch deep in water. This keeps it from drying out and wilting, but you should get rid of the ends that rested directly in the water.
To do this, hold the asparagus at the end, and about 3 inches up. Begin to slightly bend the asparagus until it snaps in a spot, probably close to the bottom. This is its natural, fool-proof, assist in making you the best chef ever. You will wow your friends with this trick if they don't cook already. (Otherwise, you might appear a little over excited about breaking asparagus...Not that I've ever experienced that. No sir.)

3. The asparagus is ready for any cooking method you wish to throw at it: steaming, bbq-ing, baking, deep frying, boiling, even microwaving.

Barbecued Lemon Thyme Asparagus:


(The photo prior to cooking can be seen at the top of this post)

Ingredients:

depending on the size of the asparagus, approx. 5 shoots of asparagus per person (prepared as instrcted above)
a generious drizzle of extra virgin olive oil
a few sprigs of lemon thyme
sea salt
freshly ground black pepper

Directions:

1. Toss already prepared asparagus spears in olive oil, salt and pepper, and lemon thyme. Then place on a barbecue safe tray. (I used a disposable tinfoil-ish one that had little tiny holes in it- hence the dark spots on my asparagus, seen above.)

2. Barbecue until the asparagus is softened, and has nice char marks. The lemon thyme will probably fall off during the cooking process, but not to worry, it will still leave a light flavor.

Toast with Peanut Butter and Strawberry...Jam??

Okay, Okay so the jam part of this little breakfast/night-time snack isn't really jam at all.

I took the most important part of the jam and made that the focus. I do really like jam, don't get me wrong. But sometimes, if I have the option of eating something in its natural state, then I will.

I know! It's crazy that sometimes people like to eat things that haven't seen an oven/microwave/stove top or packaging factory.

So for instance, instead of apple martinis, try an apple. Or instead of corn flavored popcorn, try corn. The distance we are going from the food that we grow is amazing. (If your interested in learning more about eating things that are local and perhaps in their natural state, check out the 100 mile diet here).

I got some gorgeous local strawberries today, so before topping my typical bed-time snack of PB on toast with banana, I went for the strawberries instead! I then drizzled it with honey and MMMmmmm....It was so yummy. The fresh strawberries added such a light note to the snack. In fact I didn't even need a glass of milk to wash it down. That never happens with peanut butter!

Ingredients:

1 piece rye bread, toasted
2 Tbsp. peanut butter
4 local strawberries, sliced thinly
1 Tbsp. honey

Directions:

1. Toast rye bread, and spread with peanut butter. Layer the strawberry slices over the bread and drizzle with honey.

Enjoy!

Summer Herb Garden

Do you say "h-erb" or "erb"?

Just curious.

I say "h-erb" most of the time. But occasionally I say "erb" by (accident) due to the fact that I really don't know how Canadians are supposed to say it. I once saw a video of an Australian girl who declared that down under, they pronounce it, "h-erb."

Am I being un-patriotic if I want to sound like an Australian sometimes?

Well, whichever way you pronounce 'herb', we are all talking about the same thing. Those brilliant flavor additions that can change the composition of an entire dish. And in my humble opinion, no garden is complete without some!

Today my mom and I bought a few new ones, and they are sitting beside my back deck awaiting my next meal. We went with our favourites: thyme (the lemon version) and basil. And a few new ones: dill and chives. I usually go about picking my herbs based on what is most familiar to me. If I know that a particular recipe that I love needs basil, for example, I will choose that herb in the hopes that I will find other recipes that will use it too.

Today instead of the regular basil, which was apparently sold out, we bought a Japanese basil. It smells the exact same as the regular stuff accept it has a pretty yellow border on each of the leaves. I think it will make for a really pretty garnish!


Going for the unfamiliar is sometimes fun! You can venture into a new flavor rhelm, equipt with new herbs that won't steer you wrong. I mean, have you ever tried an herb you didn't like?

Ok, wait. I have...

...cilantro.
Photo courtesy of http://pinchmysalt.com/wp-content/uploads/2007/07/cilantro-for-web.jpg

Bleh. (Sorry if you're a fan!)

But for the most part, I would say with conviction, that almost all herbs are delicious.

Get your green thumb going today and plant your favourites! (Making the transition from regular food to colourful, accented dishes, literally only a few steps away).

June 14, 2009

This Summer


Remember how last year I worked as head cook at a summer camp? (If not, read about that here).

This year I'm not cooking, and instead, I'm becoming a Rainbow counselor. (In English, that means 1 on 1 support counselor). I work for July and August with children who have special needs and play a kind of integrator/support system for them.

However I say becoming a Rainbow counselor, because this is a completely new experience for me. I have worked with kids for what feels like my entire life, but have never taken responsibility for one, individual person before.

I am so excited for this amazing opportunity even though I know I will be exhausted beyond belief come July. I have come to find that there is nothing I can't handle with God as my strength, and I am not even nervous-- yet.

I do hope to have many chances to blog throughout the summer, but I must be honest when I say that I probably will only get to the computer on weekends! That is both a blessing and a curse. I think it may break me of any bad habits I have accumulated over the past year, but my new blog will definitely take a hit. I will be fed this summer instead of cooking, and I will be talking instead of typing.

So beginning in July, the posts will dwindle, but on the positive side...I will have so much pent up food energy that I will post like a maniac starting in September!

Here's to a new summer and a new season of life!

To celebrate, check out my most recent chili post. (Why not!?)

Or check out this picture of me enjoying my last few weeks of summer-time freedom:


Cheers to the summer!

Quick and Delicious (but Forgiving) Chili


Chili has become one of my favourite foods to cook. It is fast, delicious, filling, easy on the pocket book, and best of all, it feeds a crowd! You would be surprised at how many people just show up unexpectedly when I make it. Go figure!

This recipe is as its name suggests, so quick, and so delicious; which is funny because the first time I decided to venture into the chili world I actually had no idea how to make it. The basic ingredients were understood but in terms of amounts and those secret, what is in here? ingredients, I had no clue.

So, suffice to say, from the tomato base to the spice mix, I just about guessed on everything.

And it actually turned out really well! I have been working on the recipe ever since, playing around with different things, and have found chili to be such a forgiving dish. You don't really need to know how much chili powder to add...just throw some in there, taste it, and chances are it won't be half bad. (Let's be realistic of course!)

Here is the go-to recipe that I use. Feel free to change around the beans or meat, add or subtract flavors, and make it your own. (I have tried different spices like Chinese 5 spice for richness, cayenne for heat, etc.)

Ingredients:

1 lb. ground turkey (Note: Turkey is much leaner than beef and bonus, in chili you can hardly taste the difference)
1 small can tomato paste
1 c. tomato sauce (amt can be adjusted depending on how thick you like your chili)
1 can kidney beans (not drained)
1 small cooking onion
1 green pepper, diced
1 can tomatoes (or use the regular ones-- the canned ones just have great seasoning already "built in")
1 pre-packaged chili seasoning mix (Or use regular chili powder)
black pepper, to taste

Directions:

1. Sautee onions in a large pot at medium heat until softened. Add your green peppers and (preferably) defrosted ground meat. Cook the meat until it is no longer pink and has been broken into small ground bits.

2. Add chili powder, the entire can of kidney beans (including the liquid- it adds flavor), the can of tomato paste, extra tomato sauce, canned tomatoes, and black pepper. Stir.

3. Simmer chili at low heat for at least 30 minutes and serve with cheese, nacho chips, sour cream, garlic bread, and/or cesar salad.

Note: Chili freezes great, but only freeze the chili after it has come to room temperature.

Photo courtesy of http://lukehoney.typepad.com/the_greasy_spoon/images/2007/10/04/chili_3.jpg

June 9, 2009

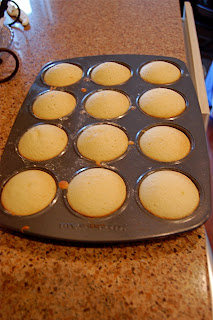
Boston Cream Cupcakes


When you get the option, what kind of doughnut would you choose? Honey dip, sprinkled, powdered and fruit filled, maple glazed, chocolate, or would you pick a boston cream? It is definitely one of my favourites! It's creamy and chocolaty, and best of all...it's not missing the center! (The extra bit of doughnut usually gets made into timbits (if you are from Canada) which cost 17 cents each.) Mmhmm...you definitely beat the system with the boston cream.

All this talk about doughnuts is getting me distracted from my actual purpose today. I don't plan on sharing a recipe with you about doughnuts actually, as you can see from the posts' title. I was simply inspired by the doughnut (which is technically inspired by the boston cream pie) in a way that brought new possibilities to the desert. I thought, why not make my childhood favorite into a cupcake? Many thanks to Martha Stewart's Living Magazine for providing the recipe.

This spongy vanilla cupcake is cut through the center and filled with a smooth vanilla cream, topped with more cake, and smothered in chocolate ganache...

I enjoyed the final product so much that I decided to have a little "photo shoot" of sorts. Featuring: the cupcake, a white plate, my table makes an occasional appearance, and some blurry backdrops.

Timmes ain't got nothin' on these babies!


Ingredients:

Makes 18

Cupcakes:

1 1/2 c. all purpose flour, plus more for tins
1 1/2 tsp. baking powder
1/2 tsp. salt
1/2 c. whole milk
3 oz. (6 Tbsp.) unsalted butter, softened, plus more for tins
3 large Eggs
1 c. sugar
1 tsp. pure vanilla extract

Vanilla Cream:

2 large egg yolks
1/4 c. sugar
2 Tbsp. plus 1/2 tsp. cornstarch
pinch of salt
1 c. whole milk
1/2 tsp. pure vanilla extract

Chocolate- Ganache Glaze:

2/3 c. heavy cream
6 oz. semisweet chocolate, finely chopped
1 Tbsp. light corn syrup


Directions:

Cupcakes:

1. Preheat oven to 350 degrees. Butter and flour standard muffin tins. Whisk together flour, baking powder, and salt in a small bowl. Warm Milk and butter in a sauce pan over low heat.

2. Beat eggs and sugar with a mixer on high speed until thick and pale, about 5 minutes. Beat in dry ingredients.

3. Bring milk and butter to a boil. With mixer on low speed, add milk mixture to batter and beat until smooth. Add vanilla. Divide batter among muffin cups, filling each halfway. Bake cupcakes until light gold, about 15 minutes. Let cool in tins for 10 minutes, then transfer to wire racks. Let cool.

4. Using a serrated knife, cut each in half horizontally. Spread 1 Tbsp. vanilla cream on each cupcake bottom. Sandwich with top. Spoon glaze over each and serve immediately.

Vanilla Cream:

1. Whisk yolks until smooth. Mix sugar, cornstarch, and salt in a medium saucepan over medium heat. Add milk in a slow, steady stream. Cook, stirring, until mixture begins to bubble and thicken, about 5 minutes.

2. Pour a third of milk mixture into yolks, whisking constantly. Return mixture to saucepan, and cook over medium heat, stirring often, until thick, 2 to 4 minutes. Stir in Vanilla.

3. Pass vanilla cream through a fine sieve into a bowl. Press plastic directly on surface. Refrigerate until cold, at least 1 hour, or up to 2 days.

Chocolate- Ganache Glaze:

1. Bring cream to a boil in a small saucepan. Remove from heat, and add chocolate and corn syrup. Let stand for 5 minutes. Whisk until smooth. Transfer to a bowl, and let cool, stirring often. Use immediately.

Simple Banana Desert

I don't know about you, but I really enjoy desert after dinner. Especially when the meal was particularly salty. I need to balance out the flavors with some sweetness after all. It is a necessity that this be done or else I crave sugar for about 2 hours after dinner, and no one wants that!

I'm only half serious:) I could go without, and most of the time choose to. But when I have bright yellow bananas sitting on my counter top calling out to me, I feel pretty good about the decision to indulge in sweetness.

Today I made a really simple and quick desert: bananas glazed with maple syrup and spiced with nutmeg and cinnamon, served with vanilla frozen yogurt. Doesn't that sound good? Simple though too. Because something really yummy (and satisfyingly sweet) doesn't have to be complicated. I leave those dishes to moments when I have a whole afternoon to bake.

However, once it was sitting before me, I realized that something was missing...


...mmhm that's more like it!


Ingredients:

1 fresh banana, sliced
1 tsp butter
2 Tbsp. maple syrup
1/8 tsp. cinnamon
1/8 tsp. nutmeg
2 scoops vanilla frozen yogurt (or regular ice cream)
1 strawberry

Directions:

1. Melt butter in a warm skillet, and place sliced bananas, flat side down. Toss the bananas with the maple syrup and spices. Cook for a few minutes (or until the bottom of the bananas has browned)

2. Assemble atop the frozen yogurt with the lone strawberry.

It's as simple as that! Enjoy.

June 5, 2009

My Favourite Bruschetta


Every single time I buy a baguette, I think of this recipe.

The first time I tried it, years ago, I was at a dinner party my mom hosted. That night I lingered around the appetizer table and absolutely demolished these little babies.

Years later I shared the recipe with my best friend Sam and she fell in love with it too! I think she still cooks it with her family now and then. (On a side note, don't you love how food brings people together? My friends and I spent many after school evenings cooking things like...our favourite bruschetta!)

And if you must know, we also made Mr. Noodle, pasta with butter and salt, grilled cheese sandwiches, left overs, pizza, and other quick, not so healthy, hold-me-till-dinner meals.

What makes this recipe different than the usual bruschetta is that you get an amazing mixture of flavors and textures: sweet red tomatoes and basil, creamy and tangy mayo and cheese, and spicy pepper and oregano. This all warmed in the oven toasting the baguette and melting the cheese....MMmmm its making me hungry just thinking about it!


If you feel like being tres professional, try baking your own baguette! You can find a good recipie here.

Note: You can make this recipie the day before and chill. Spread it onto the bread just before baking.

Ingredients:

1/2 c. light mayo
1 c grated mozzarella cheese
2 medium tomatoes, halved, seeded and finely diced
1/4 cup freshly grated parmesean cheese (or 2 Tbsp. dry)
1 tsp. whole oregano
1/2 tsp. pepper
1/4 tsp. sweet basil
1 baguette
1/3 c. butter or margarine
garlic powder

Directions:

1. Preheat the oven to 350 degrees.

2. Mix the first 7 ingredients in a small bowl.

3. Cut baguette into 1 inch slices. Butter one side and sprikle lightly with a little garlic powder (as if you were making garlic bread). Arrange the bread, buttered side up, on an ungreased baking sheet.

4. Use a soup spoon to scoop the tomato mixture onto the bread. Press the mixture down well and then pull the spoon off smoothly. I find that using a spoon helps get the perfect amount, and it sets the mixture firmly onto the bread (not as many bits will fall off).

5. Bake in the oven for 15 minutes or until hot and the cheese is melted. Serve warm.

June 4, 2009

Hippie Pancakes


If I were to dream of hippie food, this is what it would look like. In fact, if mother nature could cook, Leah and I believe she would cook something just like this: whole wheat Swedish pancakes, coloured with golden sauteed bananas, and textured with soft cream cheese contrasted with crunchy granola.

Oh hay! What a coincidence, that is exactly what we did!

After stumbling out of bed at 11am this morning, Leah and I (complete with bed head, pj's, bare feet, and no makeup...hippie style if you ask me!) were not content with making a simple breakfast of toast and jam. No sir. We were in a fancy-dancy breakfast mood this morning!

Our food smarts directed us to my brand new "Martha Stewart Cookbook!" (Purchased yesterday in fact, at the local library book store for only 8 dollars!) We found her recipe for Swedish pancakes and went from there. Cream cheese, honey, sauteed bananas, and granola play a starring role in this sensational breakfast.

Click on this picture ^
and get a really good look at the colours and textures.

If you sautee the bananas in butter and brown sugar they turn a really pretty gold colour. However I would recommend using firm, fresh bananas with no brown spots on them. This way the bananas will hold up in the sautee pan, and they won't become too sweet after being cooked.


I should note that I believe this recipe to be healthy. (It's got whole wheat, fruit, yogurt, non-fat cream cheese, and natural sweeteners! Come on now.) So eat up hungry wolverines!

Ingredients:

6 Swedish Pancakes:
2 eggs, slightly beaten
1 c milk
3/4 c whole wheat flour
2 Tbsp. melted butter
1/4 tsp. salt
1 Tbsp. sugar

Sauteed Bananas:
2 bananas, sliced
1/2 Tbsp. butter
1 tsp. brown sugar

Plain yogurt
Granola (I used a mango, cranberry variety)
Honey
Low fat cream cheese

Directions:

1. Prepare swedish pancakes by combining eggs, milk, flour, melted butter, and salt in a mixing bowl. Blend well. (Note: Don't over mix because you don't want bubbles in your batter. Aswell, melt your butter innitally in the frying pan so that it coats the surface, and then pour the melted butter into the batter. This way, you don't have to dirty another dish!)

2. Scoop batter onto your hot, greased frying pan. (Note: To ensure the pan is hot enough, sprinkle some water onto it, and if it sizzles, it's ready.)

3. Be patient as you cook your pancakes, and only flip when you see bubbles forming close to the centre. When you flip them, they only need about 30 sec. more.

4. For your sauteed bananas, melt butter in a small frying pan. Add sliced bananas brown sugar. Cook until the bananas are thoroughly covered in sugar, and you have a nice brown colour.

5. Assemble your hippie pancakes by spreading creamcheese on your pancake, bananas, a drizzle of honey, and some granola. We had to use a fork an knife to eat it, but if your brave you could use your hands.

6. Serve along side some plain yogurt to dip your pancakes in.

June 1, 2009

Leah is "So Dang Cute!"

I want to introduce you to some of the people that I mention so very often throughout my blog. They are oh, so, important to me. And they make for fabulous food buddies!

Meet Leah:


She has been one of the most influential people in my journey of becoming who I am; specifically in regards to this passion that I have for food. She encourages it, and brings it out of me in a colourful and creative way. She has a passion for people, and one day hopes to own her own restaurant/cafe. I wouldn't be surprised if this little endeavor happens sooner, rather than later.

Leah and I have been the best of friends since we were 16. We met in our high school music class, as we both had a passion for stringed instruments. The violin was our weapon of choice. We then both worked and attended a summer camp, where I eventually became the head chef.

Pretty much, we go way back :)

But enough about us, this post is about Leah!

Cooker extraordinaire.
Encourager of others (specifically moi).
Creatively blessed.
Singer, not only in the shower.
Role model.
Food TV watcher.
So extremely loyal.
Friend to all those who love life.
One on One Camp Counselor.
Fearless.
Announcer of new sayings like, "___ is so dang cute!" and "Abso-freakin-lutely!"
Bright clothing wearer.
Singer of Taylor Swift, and Miley Cyrus.
Lover of rustic, antique over new and shiny.
Bold and Enthusiastic.
Best friend through everything.


I feel like that pretty much sums everything up!

Genevieve: Love ya Cupcake!

I want to introduce you to some of the people that I mention so very often throughout my blog. They are oh, so, important to me. And they make for fabulous food buddies!

Meet Genevieve:


What a super star.

We met while attending a leadership training conference in Calgary, Alberta (both reppin' for York University, Woot, Woot!) back in the fall of 2008. This girl likes food, but you would never be able to tell if you looked at her. Why? Because she has the amazing ability to eat soooo well. Fabulously healthy and totally inshape. I envy that, but am completely inspired.

And Gen, if you read this and disagree...tough! It's my blog :)

She has her own blog called "rubber pants," which is about cupcakes no less! She is a fantastic baker and does the cutest things with sugar. Check her blog out here.

We, Gen and I, are a bit of a team. I think so anyway. That or two peas of one pod. We have a love for Food TV that cannot be severed. This sounds oh, so, romantic...and it kinda is! We go on dates all the time checking out restaurants that have been on "Restaurant Makeover." See here.

Genevieve in a few words is:

Beholder/Keeper of the prettiest of names.
Baker of cupcakes and deserts.
Inspirer of others creativity.
Organizer of life (and everything in between).
Hard worker (and high achiever! - Way to go Gen).
Colour coordination master.
Owner of a Cuisine Art Mixer.
Lover of life.
Laughs at my lame jokes.

Beautiful and kind.
Such an amazing Friend!